

Summary
This is a proof of concept for a machine that saves UPS!. Experimental, please back up your saves.
With the new Blueprint I/O sandboxes, you can simulate a blueprint for 2 minutes, analyze how the items behave inside, and do the exact same process using one single building. The UPS impact is absolutely minimal and it could even save you UPS if the blueprint is big enough!
Information:
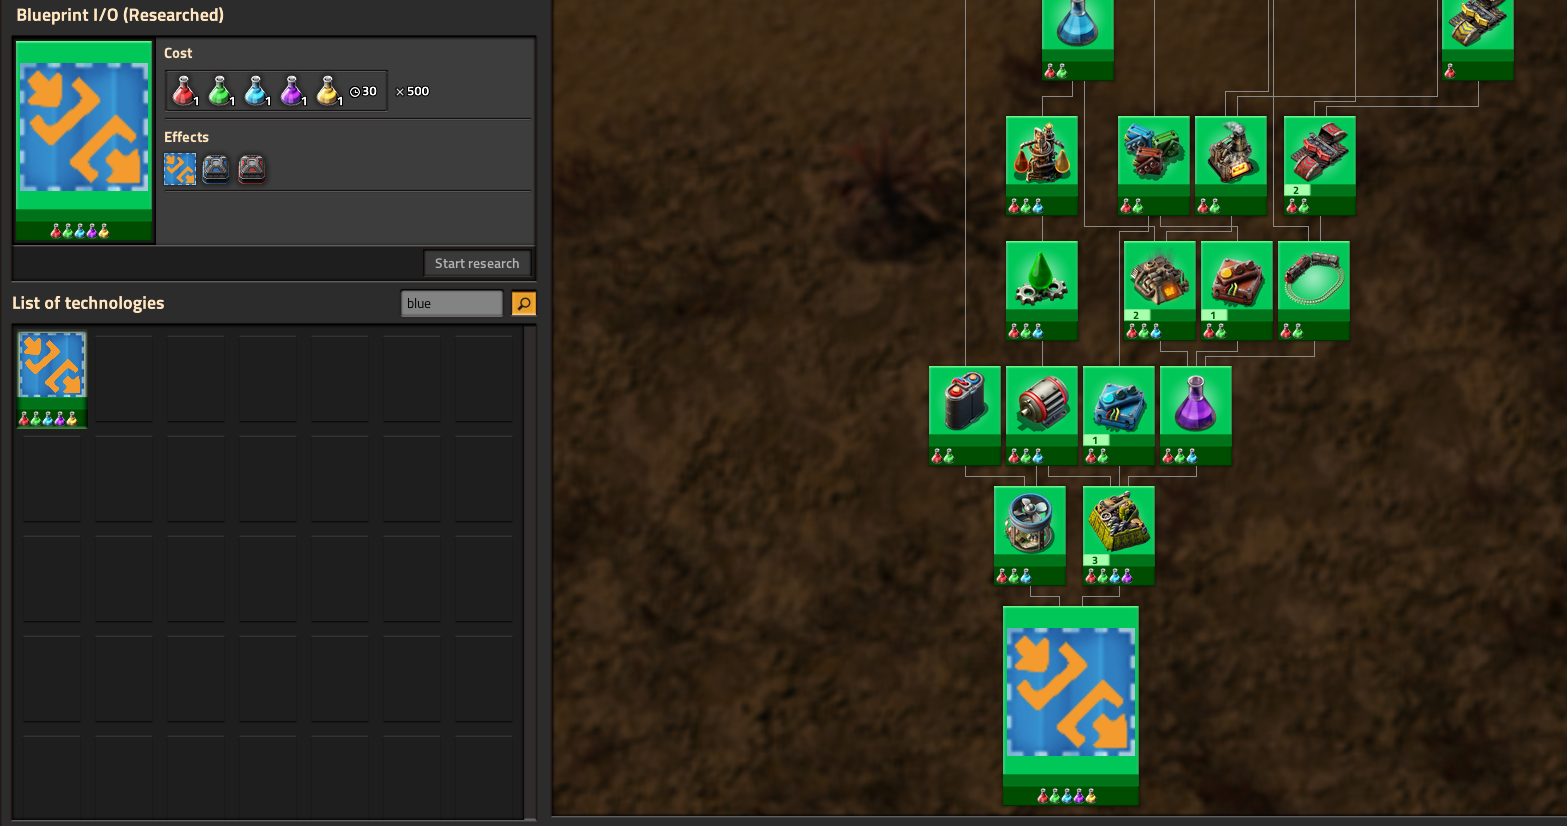
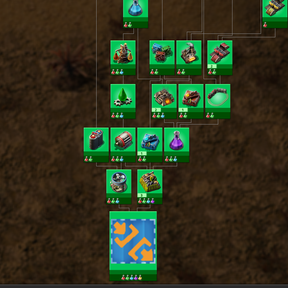
The research is unlocked at utility science, takes 500 science and unlocks three recipes.
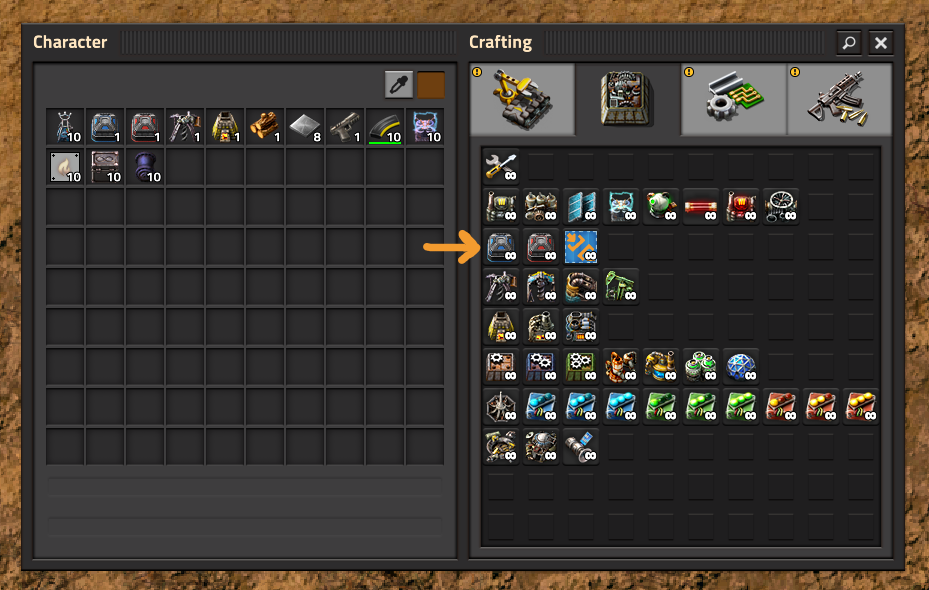
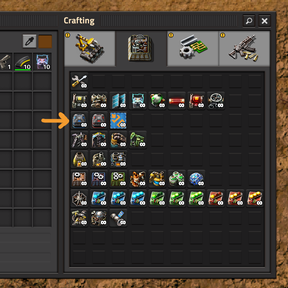
In the production tab, you can find the "Blueprint site" and "Blueprintable input" and "Blueprintable output".
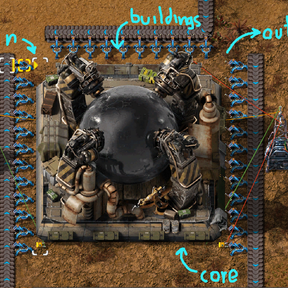
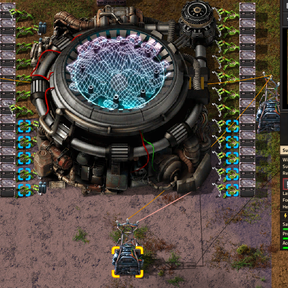
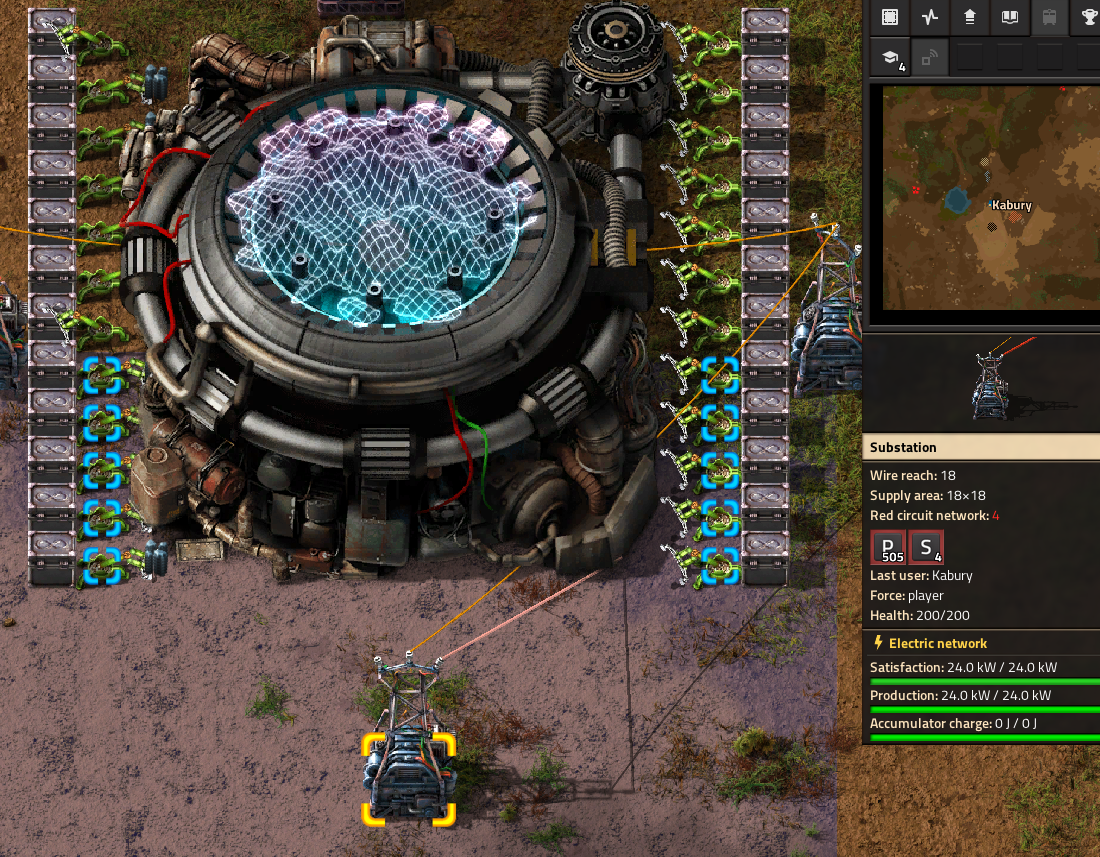
The site is built with 500 blue circuits. This is the heart of the mod. The site is composed of 4 distinct buildings:
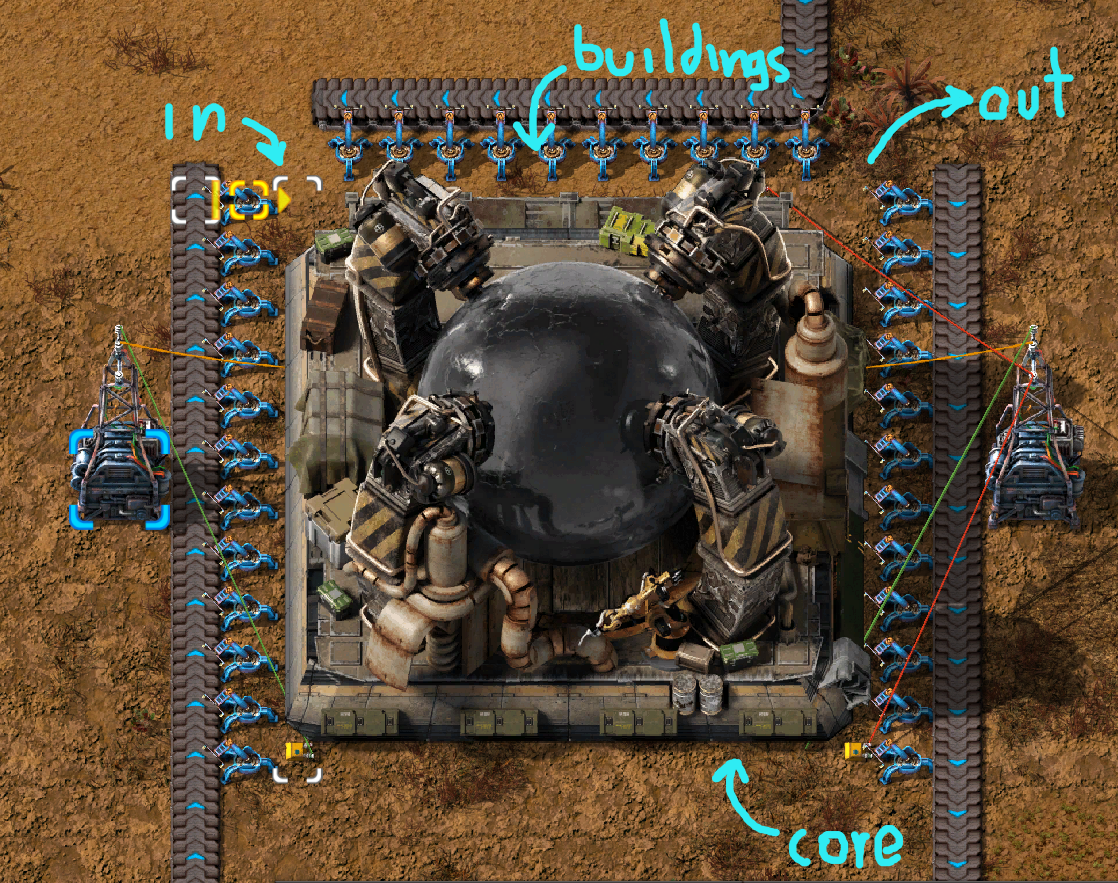
So, the buildings to the sides are called Interfaces. They are the input interface (blue), the buildings interface (yellow) and output interface (red).
Using inserters or loaders, you can only put things into the inputs and buildings interfaces but not take them out.
Similarly, you can take items out of the output interface, but not put items inside.
All of the interfaces work like simple chests, though it's useful to know, each one of their stacks can hold 100 times more than the normal amount!
So you can fit 10 thousand iron plates in one slot, or 20 thousand electronic circuits.
You can wire them to read their contents.
Really, the input and output interfaces are more important, but it's occasionally useful to be able to insert buildings inside.
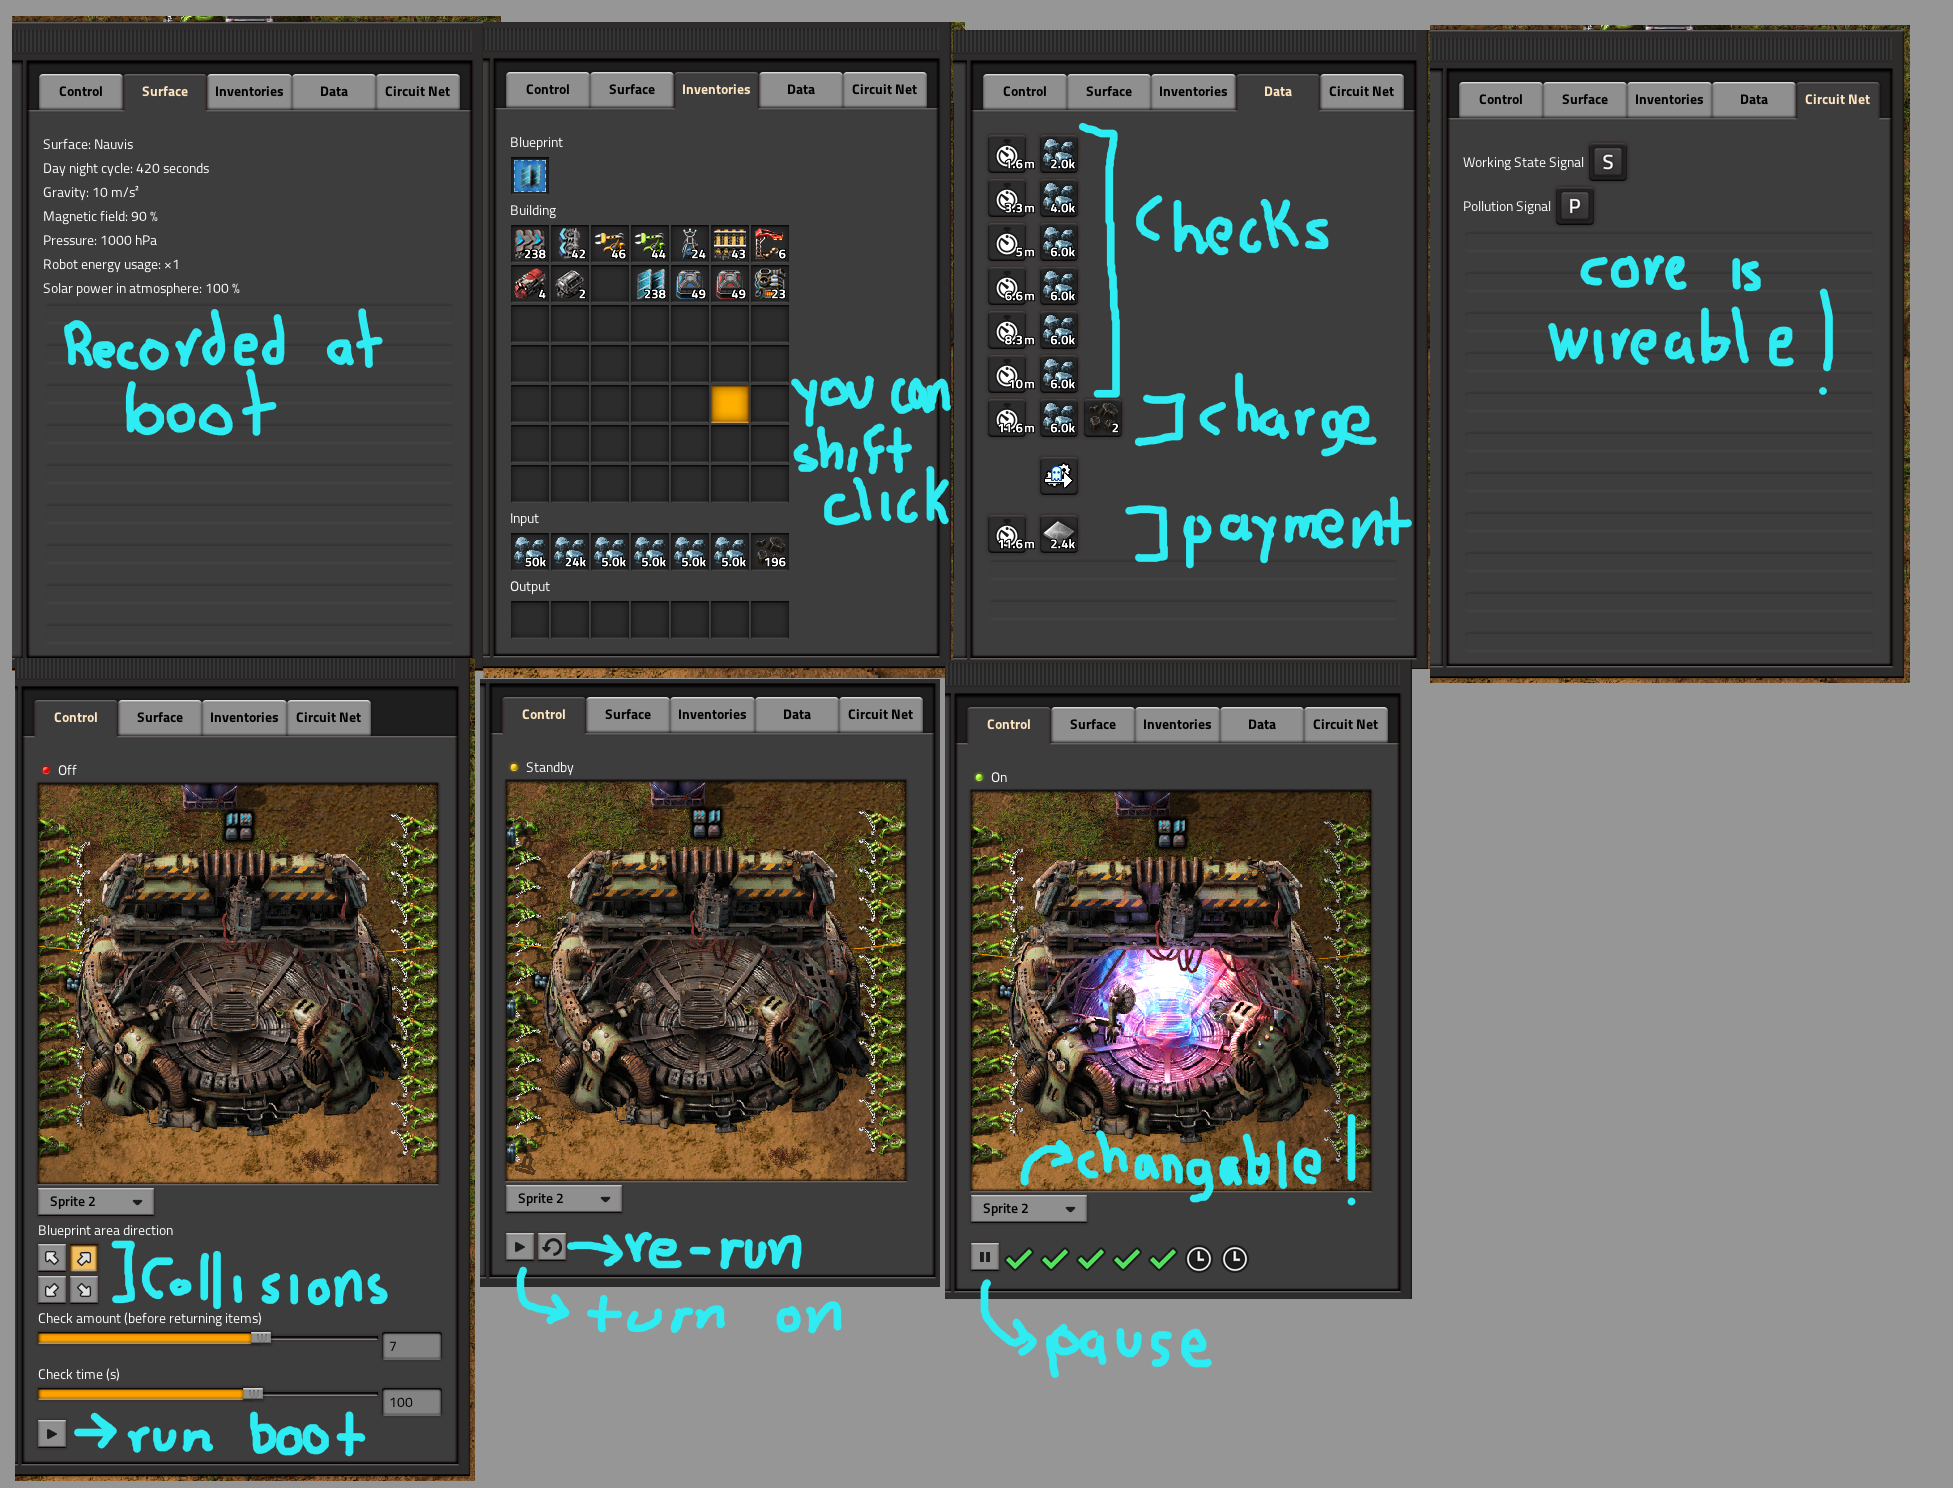
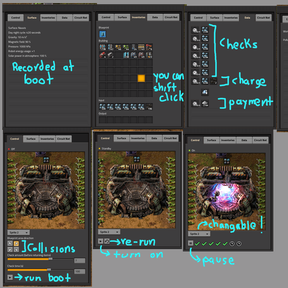
The center building, the core, is your control panel to the mod. The core has many tabs. The Control tab shows a preview of the building, so you can see things connected and inserting stuff into the interfaces. It also holds the control buttons. Well go over details later.
The surface tabs holds information about the surface that was simulated. When we haven't activated the core and simulated a surface, it only holds the surface name, but when we activate it it will give us all information about the surface: It's gravity, electromagnetic field, solar efficiency, day/night cycle duration, and all that stuff. This can change through a game so that's why we copy it only when activating the core.
The inventories tab holds all of the inventories the compound has. You can put stuff inside of the interfaces from here, but the blueprint slot is available only here. The blueprint slot is crucial to turn on the compound.
The Circuit Net tab holds information about the circuit connection to the core. To read the inventories you have to wire the interfaces, but you can wire the core too. Inside here, you can select in which signal we will output 2 values for now: the working state signal, and the pollution signal. The pollution signal is 0 when we haven't simulated, but after that, it outputs the pollution multiplied by 10 (pollution is a double while signals are integers so this gives you a bit more precision). The working state signal has this code:
1 = Off,
2 = Booting (The surface/blueprint is being simulated),
3 = Standby (We have finished working. The data tab and pollution info is available for review, but we haven't turned on the core yet.)
4 = On.
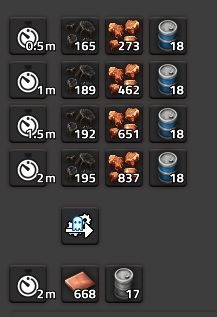
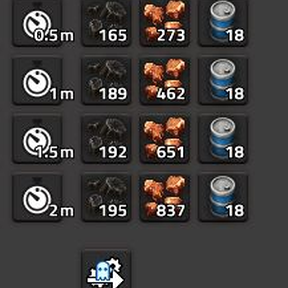
The data tab can be a little confusing, but it holds all the information that summarizes the blueprint. So, what the core does, is it will check at a certain point in time (shown with a clock) that the inputs (all of the lists above the ghost crafting arrow) we see are present in the input interface. If all checks are successful, then the core will consume the items shown at the last check and will reward all the output items (the ones below the ghost).
In a way, the data tab tells you the "recipe" this surface makes.
So, how do we tell the core which surface to simulate? We have to give it a special kind of blueprint.
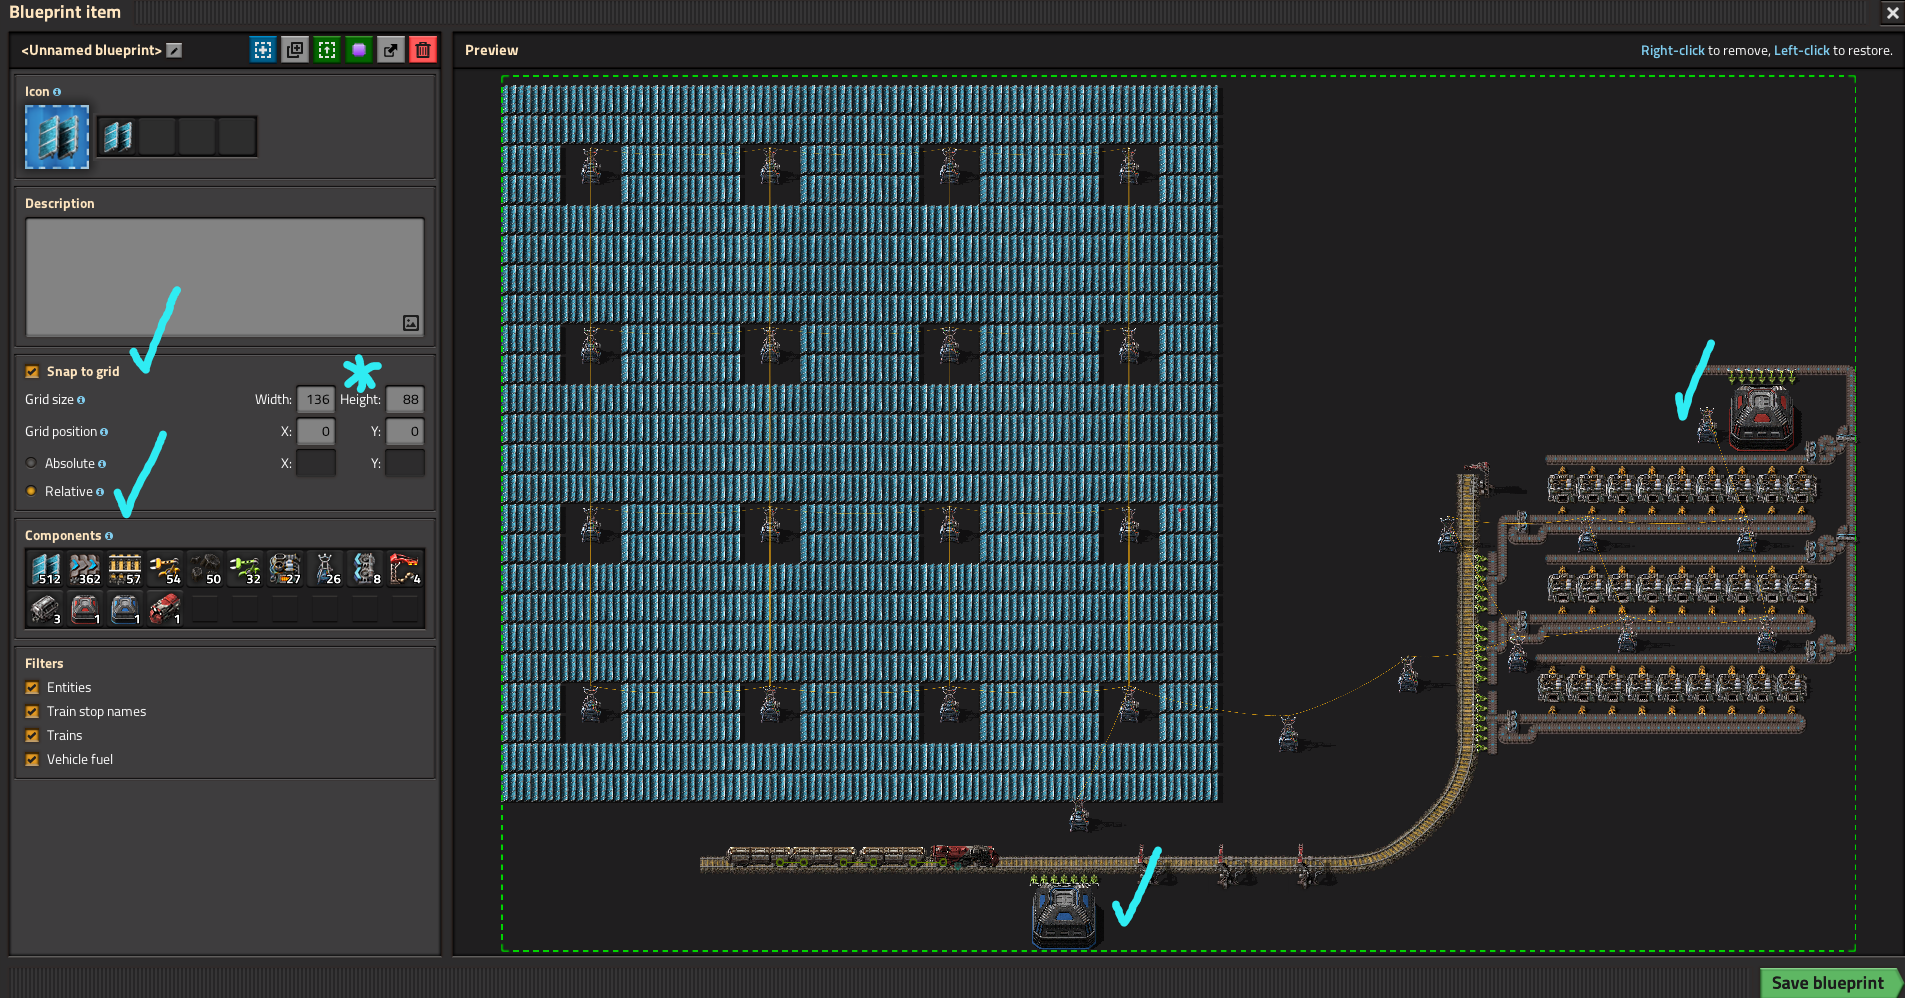
The blueprint has to have snapping enabled, with relative mode selected. As a warning, if you're spawning vehicles inside the blueprint, do not put the vehicles near the border.
The second condition is that it has to have exactly one "Blueprintable input" building and one "Blueprintable output" building. These buildings are only useful to make your blueprints with, because you can't automatically put items inside the input, or automatically take items from the output.
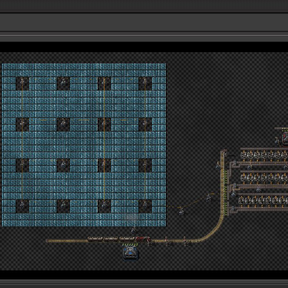
This blueprint has to be fully autonomous and will only get the items you put into the input interface. So you have to kickstart and generate your own power (either with burner inserters or solar panels) and keep generating enough power for your isolated factory. In the example image you can see a power setup which uses a small isolated network to power an unbarreling machine to kickstart steam electricity generation.
You can decide what machines you want, how many, how to connect them, to use trains, bots or belts inside the blueprint. Design however you want! Unleash your creativity!.
One important caveat: When we are simulating, any item that stays inside the blueprint box and remains there for the whole 2 minutes is not counted as consumed. The moment it leaves the chest, it counts as an "input" or "ingredient". If you leave something outside the input and don't deliver the item to the output chest or use the item in a crafting recipe and deliver the crafted input to the output chest, that item will be voided/eliminated every cycle of the core. Beware! Design your blueprints so they don't leave items outside after 2 minutes.
To turn on the machine, do the following:
- Put the special blueprint inside the blueprint inventory in the core.
- Put all the buildings the blueprint needs inside the building interface (also accessible from the core).
- Click the run button in the control tab.
When we start the simulation, the whole GUI will be replaced:
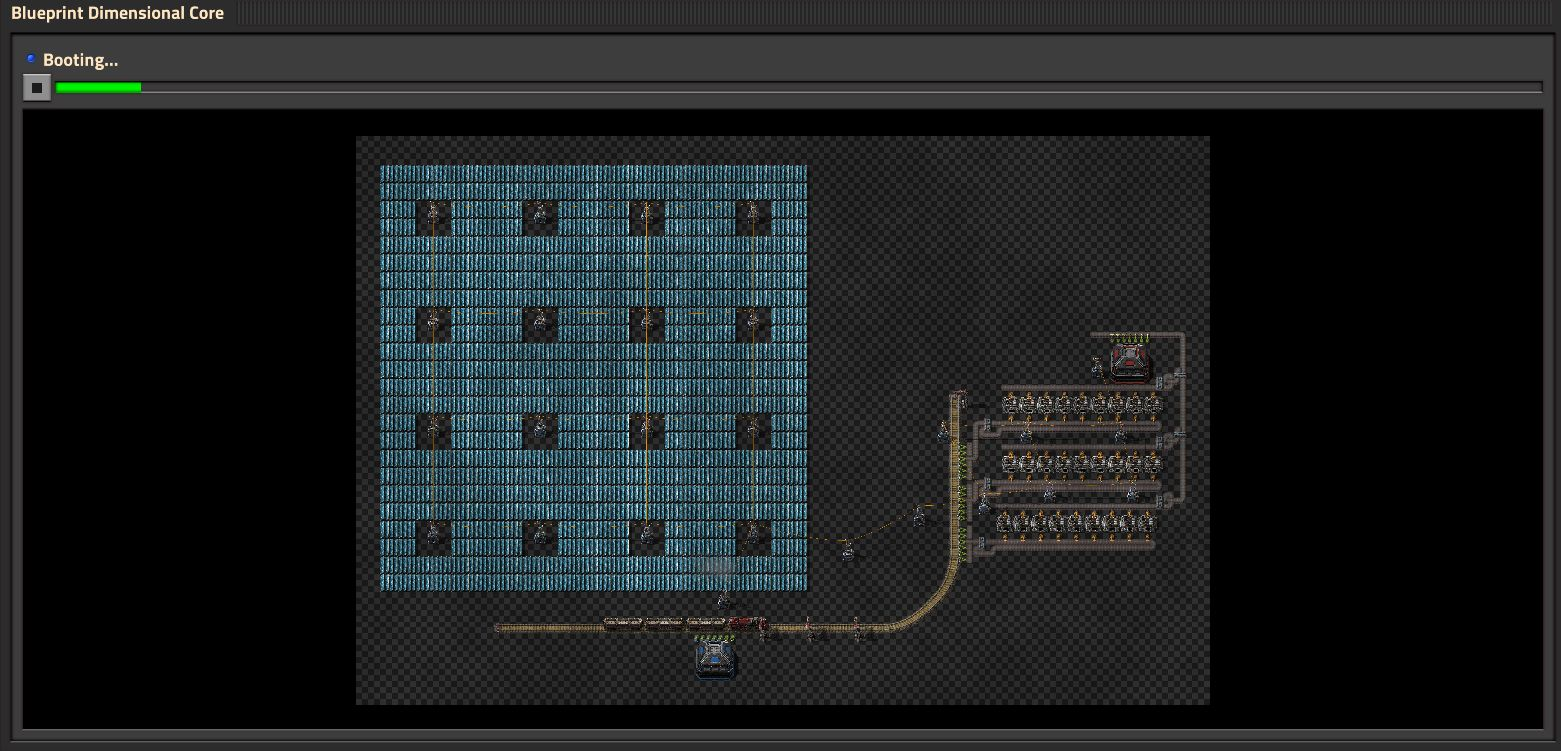
Here, we leave the inventory and the tabs to show as big as we can the surface being simulated. You have a loading bar to see how much of the 2 minutes has happened. You can monitor your progress here to see if the blueprint behaves as you expected, or close the window and come back later.
When it finishes, the core will enter standby. We already went over what each state meant, but here's how the non-booting states look in the control bar:
When we're off, pressing play will start the simulation.
When we're in standby, we can press play to turn on the core and begin the checks, or the reset button to go back to off. This was provided so you could try improvements on your blueprint.
When we're on, we can press pause to go to standby. A new tray of sprites appear, and they tell us if we have passed or failed the different checks.. A check is passed, a cross is failed, and a clock is a check we haven't done yet. To work as intended, we have to pass ALL checks. Missing one check will damage your building a bit. At the end of the cycle, the input items will be consumed, but the output items will not be rewarded. Finally, the machine will still generate the normal amount of pollution. So players are heavily incentivized to never miss a check!
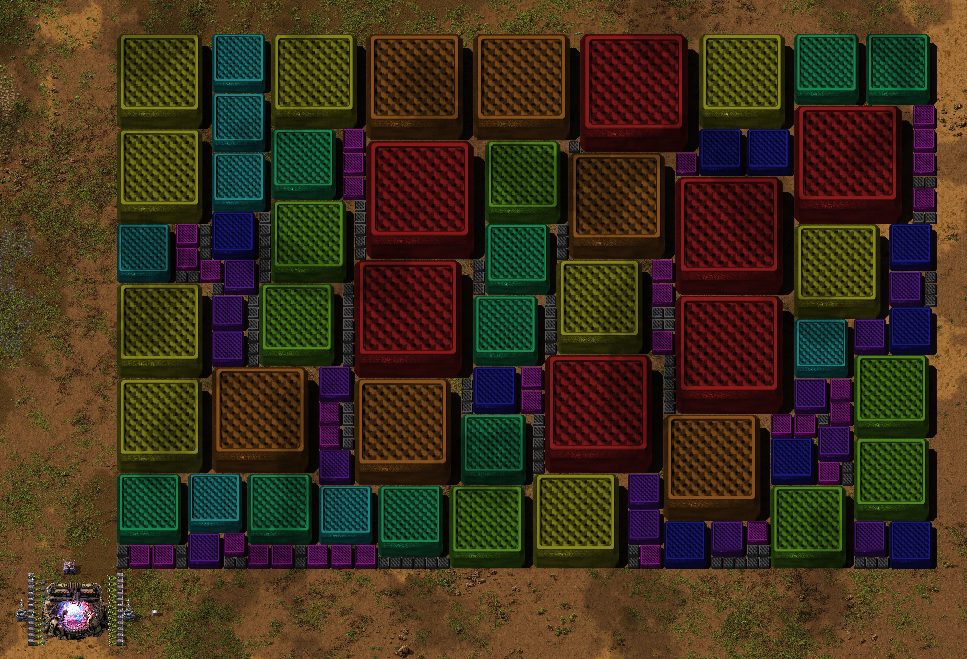
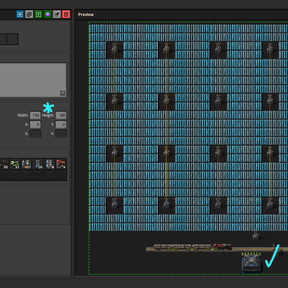
You can choose which area of the world the blueprint will occupy space. This will spawn "confetti" that is just entities that don't cost UPS (they're like rocks) but just prevent you from building there. You have to clear up the area before you can build the blueprint on it!
The confetti disappears when you turn off the blueprint core.
If the building takes enough damage from missed checks (it warns you every bit of chip damage, don't worry) the entire thing will be destroyed and everything inside will be lost. Don't let the core miss any checks, and don't let the biters near it!!
If you want to deconstruct/mine any of the entities in the compound, I recommend getting the items out of it.
Mining one interface mines them all, and as they can hold more stacks than normal, they could try to get rid of 58000 stacks and a ton of items would spill in the ground!!!. Always leave the cores (all interfaces and blueprint slot) empty before mining.
Recommended companion mods
https://mods.factorio.com/mod/kry-solid-fluids?from=search (So you can transfer non-barrelable modded fluids inside the dimension, or not bother with barrels)
https://mods.factorio.com/mod/BatteryElectricTrain?from=search (So you can generate power inside the dimension and export it as items. Or have a very small power setup by importing batteries. Only export power if you are using something other than solar panels. Solar panels are extremely UPS friendly!!!.)
Notes
Cores respect ribbon worlds. Make your blueprint fit into the surface the core is on.
Credits
Special thanks to:
Shemp: https://mods.factorio.com/user/Shemp
PennyJim: https://mods.factorio.com/user/PennyJim
KiNg
O5MO: https://mods.factorio.com/user/O5MO
justarandomgeek: https://mods.factorio.com/user/justarandomgeek
And the rest of the mod development help people who helped blueprint_io become a reality <3