
Automated railroad/railway crossing tutorial
Step 1: Set up roads and signals at your desired crossing position

Doesn't need to be pretty, but the two road lanes should be separated from each other by some kind of road marking.
Step 2: Place stop signs and road sensors
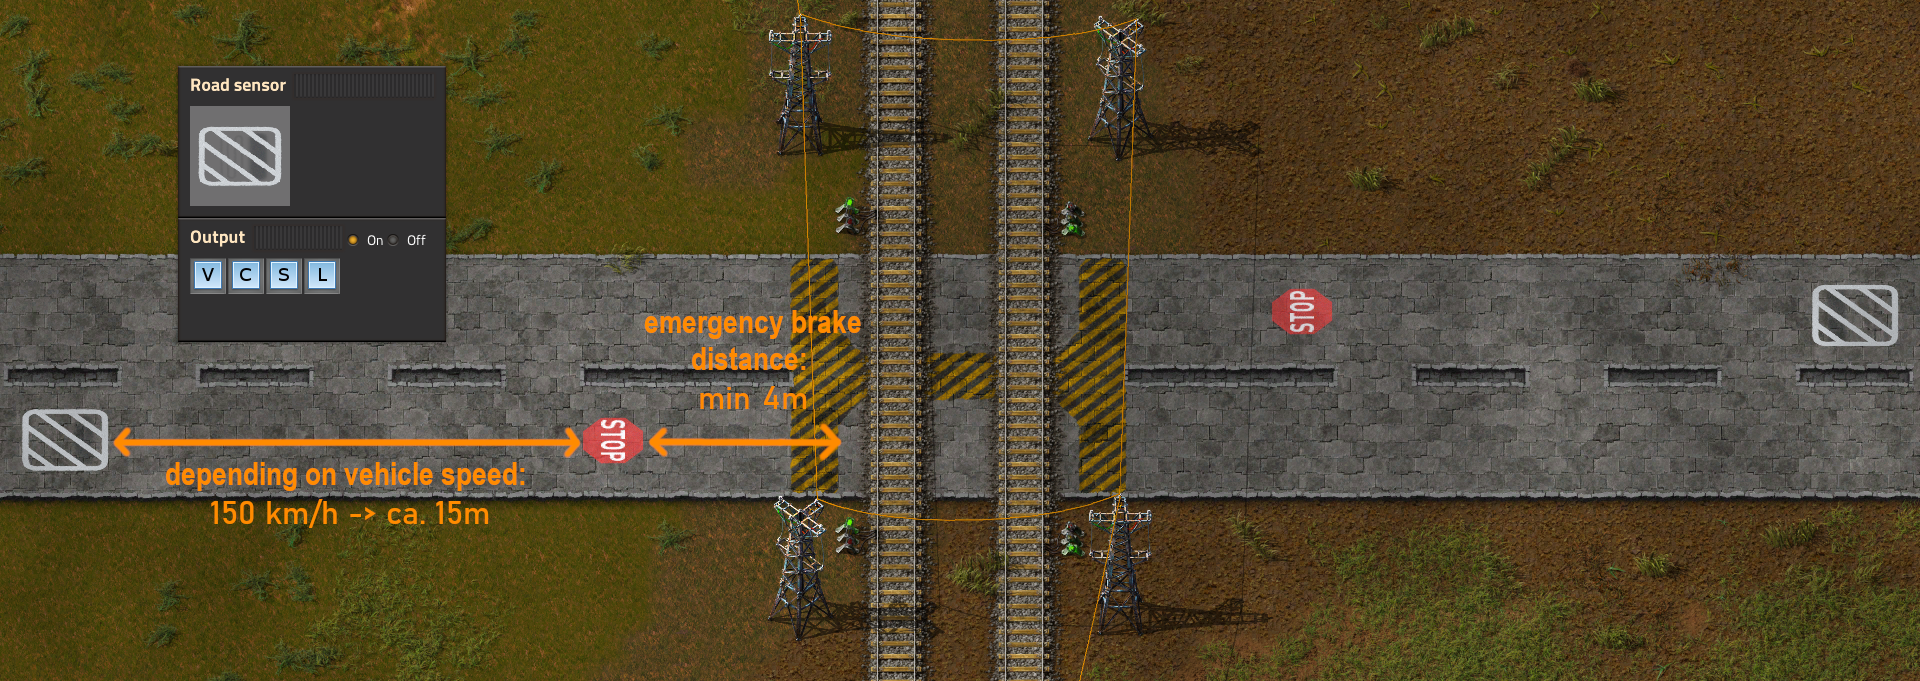
Step 2.1 Stop signs
Stop signs will stop all vehicles within approx. 4 tiles (this is assured by script). If you keep this safety distance between stop signs and hazard areas you'll be safe. Now the vehicle only needs someone to tell it if it should stop or not. To achieve this, we need the road sensor:
Step 2.2 Road sensors
Place a road sensor a few tiles in front of the stop sign and repeat this for the other side of the crossing. For now set all initial signal values of the sensor to "0", the'll be explained later. Road sensors should be placed ["maximum expected vehicle speed" div 10] tiles before stop signs, if you want smooth braking. E.g.: If you ride your cars at 150 km/h, place the road sensor 15 tiles in front of your stop sign.
Please note: Road sensors interact with player-controlled vehicles only if their driving assistant and cruise control is set to active.
Step 3: Set up circuit logic

We need a bit circuit logic to tell the road sensor the things it needs to know about the crossing and when it should stop vehicles.
The constant combinator outputs two signals "L" = 50 and "S" = 1.
- The signal value of "L" will be interpreted as the allowed speed if the crossing is closed (i.e. a train is approaching). Vehicles will decelerate if they're above this speed (and accelerate if they are below).
- Signal "S" tells the road sensor how many stop positions there are for vehicles. If you expect more than one vehicle on your road (e.g. on a server) just place more stop signs behind your first sign, again with 4 tile distance to eachother. Additional stop signs act as waiting positions, and will be skipped if you're the only one waiting.
The arithmetic combinator sums the number of red and yellow into a signal "T". The yellow and red signals are obtained from train signals, which will be connected in the next step.
The decider combinator checks if a train is approaching, i.e. "T" greater than zero. If this is the case, it outputs the control signal "C" with value = 1, else it will be = 0.
- The signal "C" is the control variable for any road sensor. If it's value is 1, vehicles will stop at the closest free stop position in front of the crossing. If it's set to "0", vehicles are allowed to pass the crossing with maximum speed. (Setting it to "-1" will remove any road sensor control from a vehicle, but this is needed only for special cases.)
Step 4: Cable salad

Now the road sensors need to be connected to the constant combinator and the output of the decider combinator (green cable in the picture above).
The inbound train signals are connected to the input of the arithmetic combinator (red cable in the picture above)
Step 5: Lights and sounds (optional)
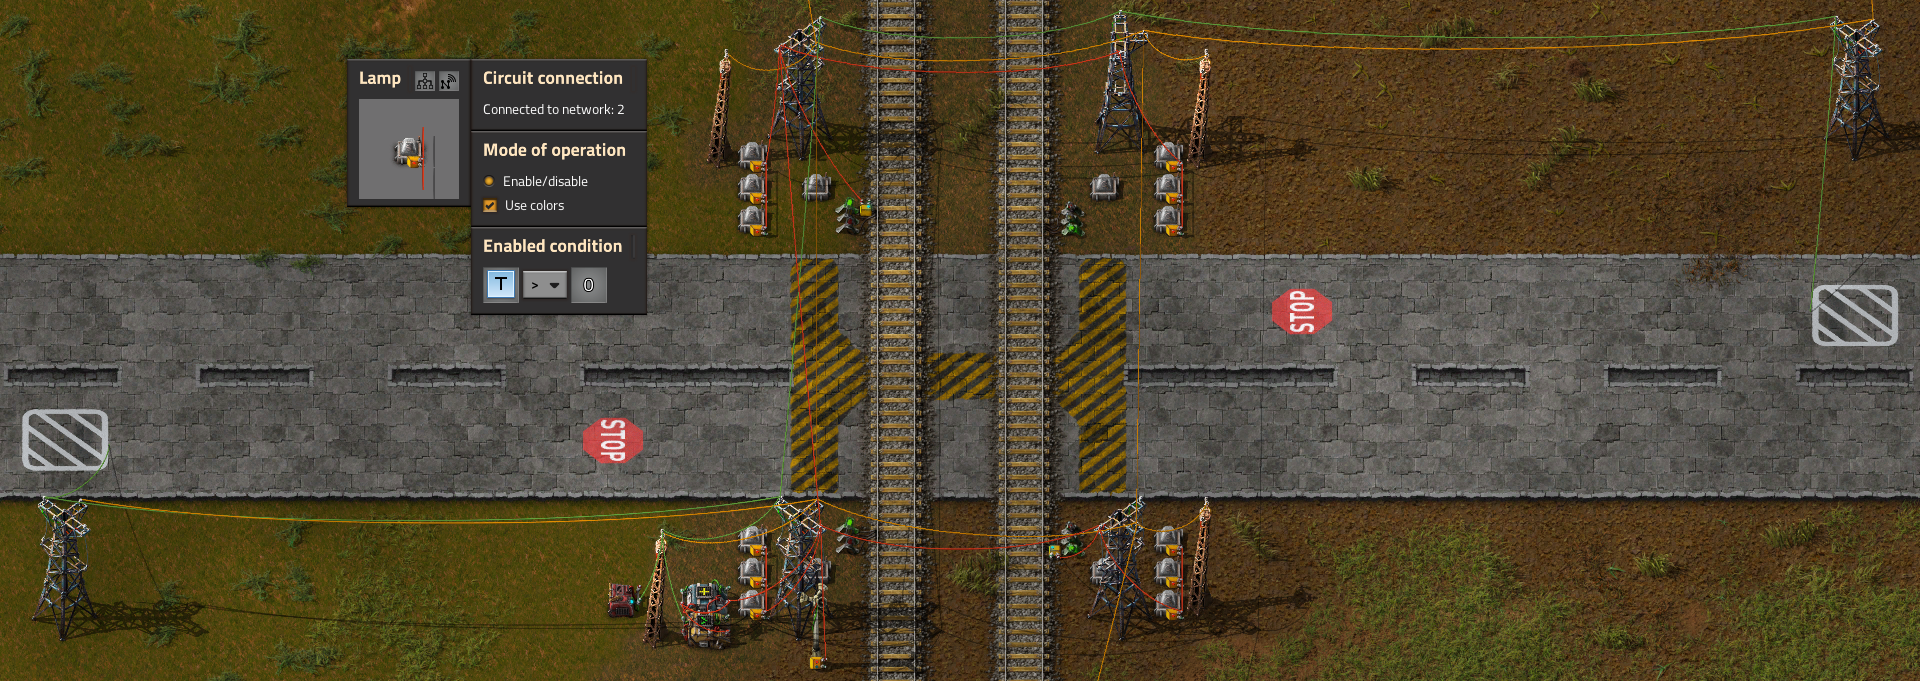
Bonus step: Set up some lights and a speaker to beautify your crossing. Connect them to the output of the decider combinator and enable "use colors" for the lamps. Make sure to connect them to the same circuit network the train signals are connected to if you want yellow and red warning signals.
Done!

Congratulations: You completed your first fully automated railroad crossing!
Whenever a train approaches the crossing, the road sensor will receive "C" = 1. If a vehicle drives over the sensor, it will decelerate and stop just after the stop sign. As soon as the train cleared the crossing, the sensor will receive "C" = 0 and automatically start all vehicles waiting at their stop positions.
- To improve safety, you can connect additional, more distant train signals, which will give the logic more warning time.
- If you find yourself waiting very long at some crossings, just add another logic to close the train signals if you're approaching the stop position - to do this, all you need is to evaluate the signal "V" the road sensor outputs!