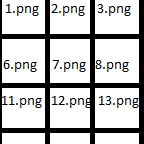
Whenever the player, or robots place an entity, that chunk is added to the list of chunks which get screenshot at the configured interval and saved in the configured folder. The saved files are in specific format, the path is mods\script-output\NAME\TimeOrder-GridSize\gridPosition.png . Basically, you can set NAME for each different map.
TimeOrder is the chronological order of the picture. Starts from 0, as time goes by. The grid Size is for easy montage making. If you have placed buildings in two adjacent horizontal chunks, then grid size will be 1x2 (rowsxcolumn) and the name of the png files will be 0.png and 1.png , starting from top left to top right, then a row down. SO if you have placed buildings in 2 horizontal chunks with 1 chunk gap in the middle, then the numbering of the 2 files will be, 0.png and 2.png that indicates that a 1.png in missing, that was a chunk that didint have any buildings in it. If you want this chunk to be screenshotted anyways, just place any entity in this chunk and remove it, and that chunk will be screenshoted from that point on.
You can see which chunks are being captured by pressing ctrl+I and you will see red cursors on the tracked chunk corners. And if you want to remove a chunk from being screenshotted, have your player stand in that chunk and press ctrl+Y, and you will see the message in console too, like in the image attached.
The numbering of the png files is such that it is easy to use with any montage utility such as "imagemagick montage" free utility to make high res montage from number ordered picture, you give it the grid size, like 5x4 and then it places 0.png in the top left corner and goes all the way to top right corner then starts down the column. so the eventual image will be like shown in the second image.
Any questions. Feel free to contact me on discord, hanging in factorio official server, name, stromhurst
note: All images taken are at 512x512 pixels, so folders with big bases tend to accumulate GB's of pictures.
Version 0.1.1 update:
Requested Feature Added: an option in options>mods setting to enable day only imaging or not, its a check box, if its checked, its turned to day before every image capturing, by default its on, for night shots, remove the check.
Bugs: If timelapse red corncer markers were turned on, they would show up in the captured images. It is now fixed, markers don't show in the screenshots
Enhancement for better usage: Now it takes images of even the empty chunks that lie within the rectangle grid of your active chunks. So there wont be any missing blank spaces. This greatly increases the sizes of each captured folder. So its advisable to stitch the files together every so often and delete these original chunk files.
Powershell scripts usage for win10 users for now, using imagemagick. You need to run these two commands in your powershell to stitch images together.
To name all the numbered files in a folder to have leading 0's padded to it, otherwise imagemagick gets confused with number ordering.
1.Get-ChildItem path/to/folder | Where{$.basename -match "^\d+$"} | ForEach{$NewName = "{0:d8}$($.extension)" -f [int]$.basename;rename-item $.fullname $newname}
To stitch the actual pictures in the folder and give the end result image.
2 .\montage.exe path\to\foldername(4-20x9 e.g.)*.png -geometry +0+0 -tile 20x9(the actuall grid size thats written in the name of your folder 20x9 in this case) timelapseSequence(which will be written in your folder name, 4 in this case).png
or for ease, you can just copy paste the folder to the imagemagick folder and do operations there in batch.
EDIT: tutorial on how to use imagemagick and windows powershell to make timelapse videos will be posted on stromeon.com/factorio shortly, keep checking there.
ver 0.1.2: Added blacklisting. Now you have 6 settings in per user mod setting which can toggle which entities trigger adding the chunk to the time lapse. If you have any of the category checked, for example, poles category, then when you place poles of any kinds, those chunks will NOT be automatically added to the screen capture list.
If you want to manually add or remove chunk from being screen captures, ctrl+y toggles the chunk where your char is standing.


